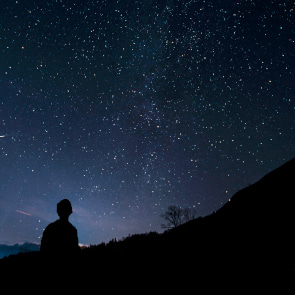
Astrophotography 101: Capturing Stunning Images with the Celestron StarSense Explorer
 Astrophotography allows us to capture the beauty of the cosmos through photography, blending science with art. With the Celestron StarSense Explorer, you can embark on a journey to capture stunning images of celestial objects. Let's delve into the essentials of astrophotography and how you can create mesmerizing images using this innovative telescope.
Choosing the Right Setup
Before you begin, ensure you have the proper equipment. The Celestron StarSense Explorer is an excellent choice for astrophotography due to its ease of use and accurate tracking capabilities. Pair it with a sturdy tripod and a DSLR camera capable of long exposure shots. Attach your camera securely to the telescope using the appropriate adapters.
Understanding Exposure Settings
Achieving the perfect astrophotograph requires mastering exposure settings. Set your camera to manual mode and experiment with exposure times. Start with shorter exposures to capture bright objects like planets and the Moon. For fainter objects like nebulae and galaxies, longer exposures are necessary to gather enough light.
Aligning Your Telescope
Proper alignment is crucial for astrophotography. Use the Celestron StarSense app to align your telescope accurately. This app utilizes your smartphone's camera to pinpoint celestial objects, ensuring they remain in view throughout your exposure. Align the telescope to the North Star or a bright star for precise tracking.
Capturing Planetary Shots
Planets like Jupiter and Saturn offer striking subjects for astrophotography. Use your Celestron StarSense Explorer to track these planets as they move across the night sky. Experiment with different magnifications to capture details such as cloud bands on Jupiter or the rings of Saturn. Adjust your camera settings to highlight these features.
Photographing Deep-Sky Objects
Deep-sky objects, such as nebulae and galaxies, require longer exposures and darker skies. Use the StarSense app to locate these objects and center them in your telescope's field of view. Take multiple exposures of several minutes each to capture enough light. Stack these exposures using software to reduce noise and enhance details in your final image.
Processing Your Images
Once you have captured your images, processing is essential to bring out the best in your astrophotographs. Use image processing software like Adobe Photoshop or specialized astrophotography software to adjust levels, enhance details, and reduce noise. Experiment with techniques such as stacking to improve clarity and contrast in your final images.
Tips for Successful Astrophotography
-
Patience and Practice: Astrophotography requires patience and practice. Experiment with different settings and techniques to refine your skills.
-
Dark Sky Locations: Choose locations away from city lights to minimize light pollution and improve image quality.
-
Keep Equipment Stable: Use a sturdy tripod and ensure your telescope is securely mounted to prevent vibrations during long exposures.
-
Learn from Others: Join online forums or local astronomy clubs to learn from experienced astrophotographers and gain valuable tips.
Conclusion
Astrophotography with the Celestron StarSense Explorer opens a window to the wonders of the universe. Whether you are capturing planets, nebulae, or distant galaxies, this telescope empowers you to create stunning images that inspire awe and curiosity. With dedication and the right techniques, you can embark on a rewarding journey of exploring and photographing the cosmos. Unlock the beauty of the night sky through astrophotography with your Celestron StarSense Explorer today.
Breadcrumbs
Tags